SAML Group & Role Mapping
Table of Contents
Overview
SD Elements now supports the mapping of SD Elements groups and roles to groups and roles that exist within a user’s SAML client.
Activating the Feature
To use the new SAML Group and Role mapping feature you will need to activate the feature flag.
Prerequisites
-
The user has the system Super User permission.
-
The Advanced Single Sign On feature has been activated under from the gear icon menu under Features.
Steps
The following steps will walk you through activating the feature within your instance of SD Elements.
-
Log in to SD Elements with super user credentials.
-
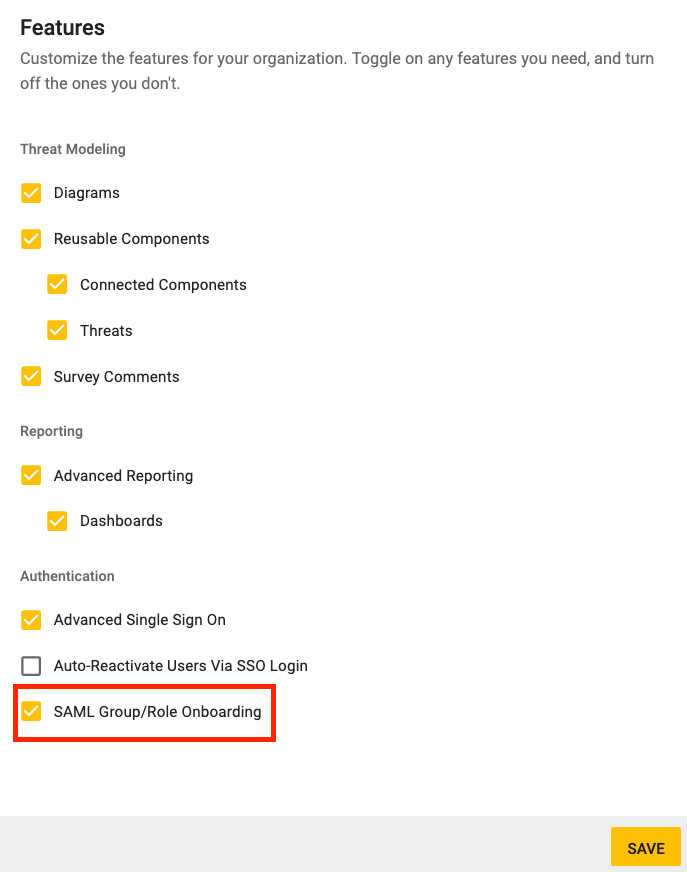
From the gear icon menu, select Features.
-
Check the box to the left of SAML Group/Role Onboarding
-
Click the Save button.
Configuring SAML Role Field in SD Elements SAML Form
Configuring this field to the SAML Role attribute Name on your SAML client will allow mapping of a user’s SAML role to an SD Elements role and assignment of that SD Elements role to that user.
| If no role mappings are defined or if no roles are matched, new users will be assigned the organization’s default role. |
Prerequisites
-
The user has the system Super User permission.
-
A SAML Integration has already been configured, or you are configuring a new SAML integration. If you are configuring a new SAML integration and have the form open, skip to step 4.
Steps
The following steps will walk you through adding a SAML Role attribute name to your SAML configuration.
-
Log in to SD Elements with super user credentials.
-
From the gear icon menu, select Authentication.
-
Hover over the SAML entry on the table and select the pencil icon on the right.

-
Within the form window, expand the Advanced Configuration section.
-
Input the SAML Role Attribute name in the field under the heading SAML Attribute for Role Mapping
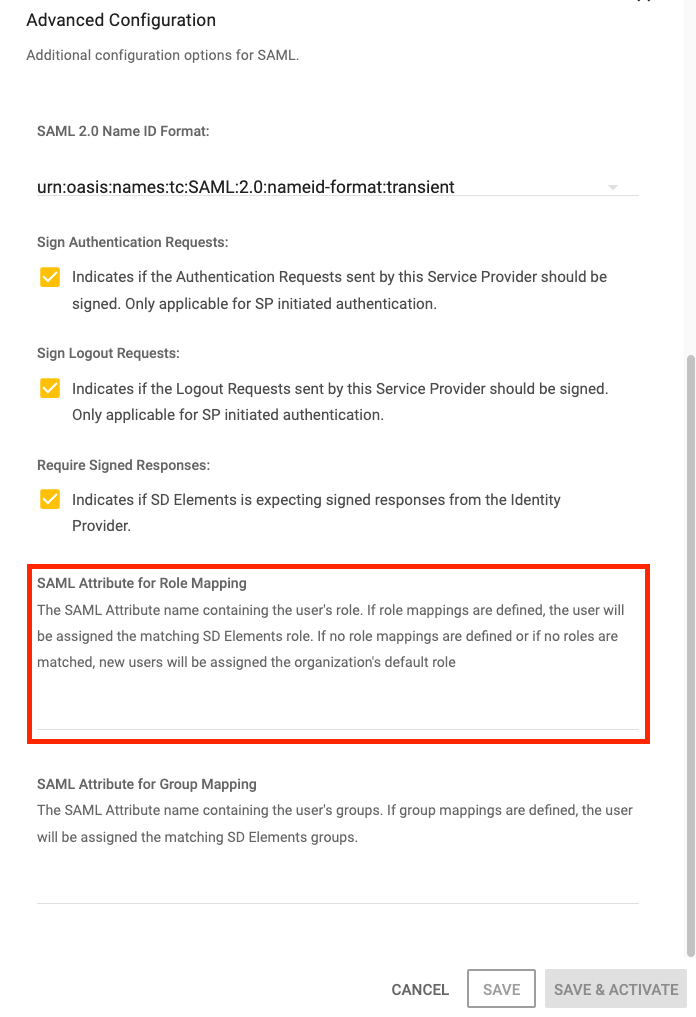
-
Click the Save or Save and Activate button.
Configuring SAML Group Field in SD Elements SAML Form
Configuring this field to the SAML Group attribute Name on your SAML client will allow mapping of a user’s SAML group to an SD Elements group and assignment of that SD Elements group to that user.
Prerequisites
-
The user has the system Super User permission.
-
A SAML Integration has already been configured, or you are configuring a new SAML integration. If you are configuring a new SAML integration and have the form open, skip to step 4.
Steps
The following steps will walk you through adding a SAML Group attribute name to your SAML configuration.
-
Log in to SD Elements with super user credentials.
-
From the gear icon menu, select Authentication.
-
Hover over the SAML entry on the table and select the pencil icon on the right.
-
Within the form window, expand the Advanced Configuration section.
-
Input the SAML Group Attribute name in the field under the heading SAML Attribute for Group Mapping
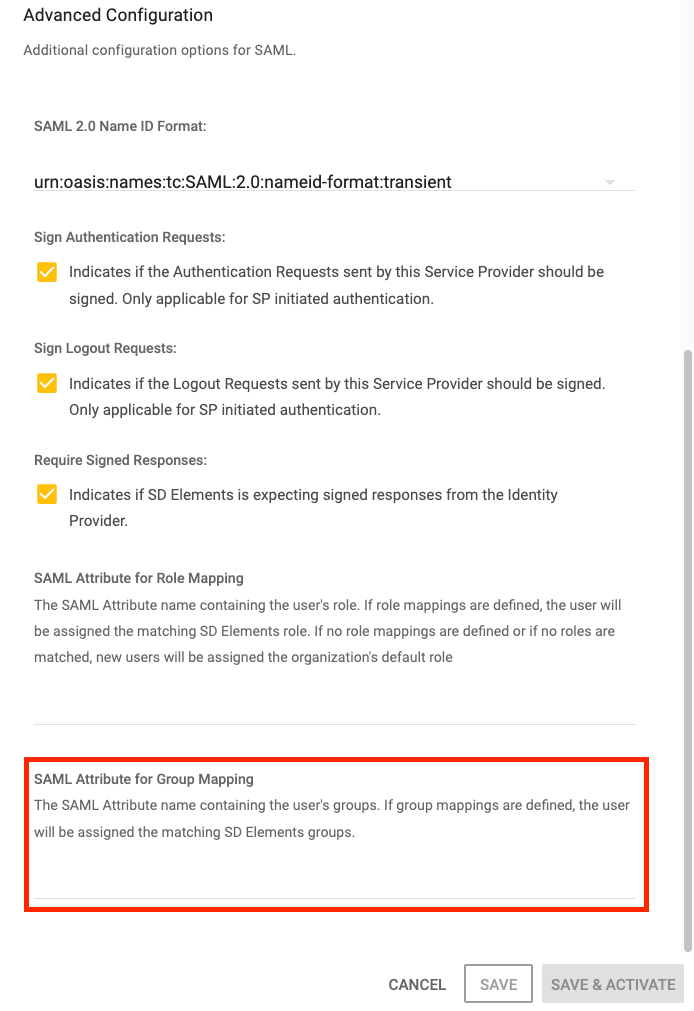
-
Click the Save or Save and Activate button.
Create SAML Role Mappings
Prerequisites
-
The user has the system Super User permission.
-
The SD Elements role you wish to map to must already exist on your instance.
Steps
The following steps will walk you through creating a SAML to SD Elements role mapping.
-
Log in to SD Elements with super user credentials.
-
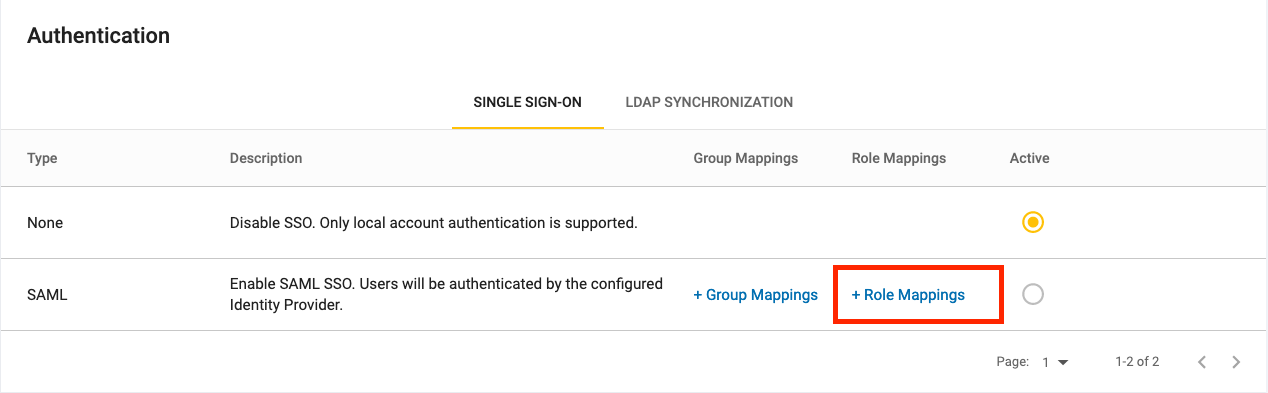
From the gear icon menu, select Authentication.
-
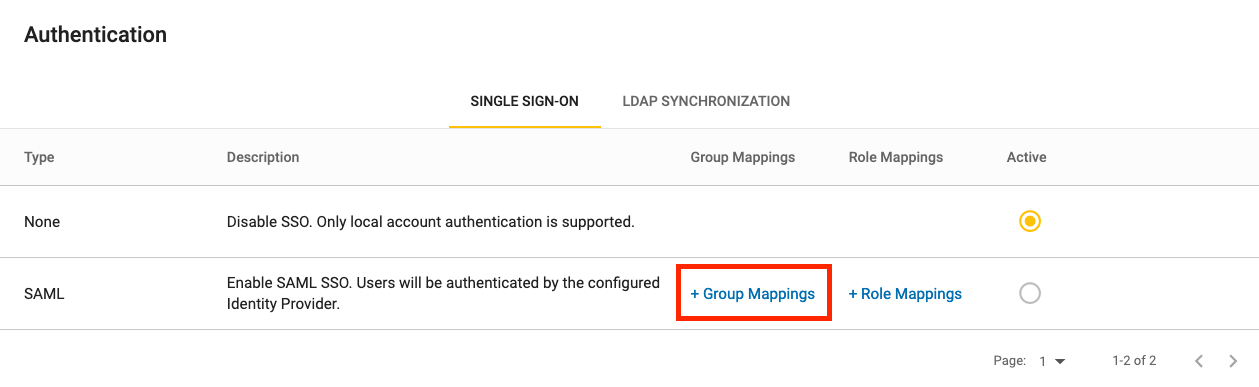
Click + Role Mappings on the SAML line item you wish to create the mapping for.
-
Click the yellow + Role Mapping button on the top right area of the screen.
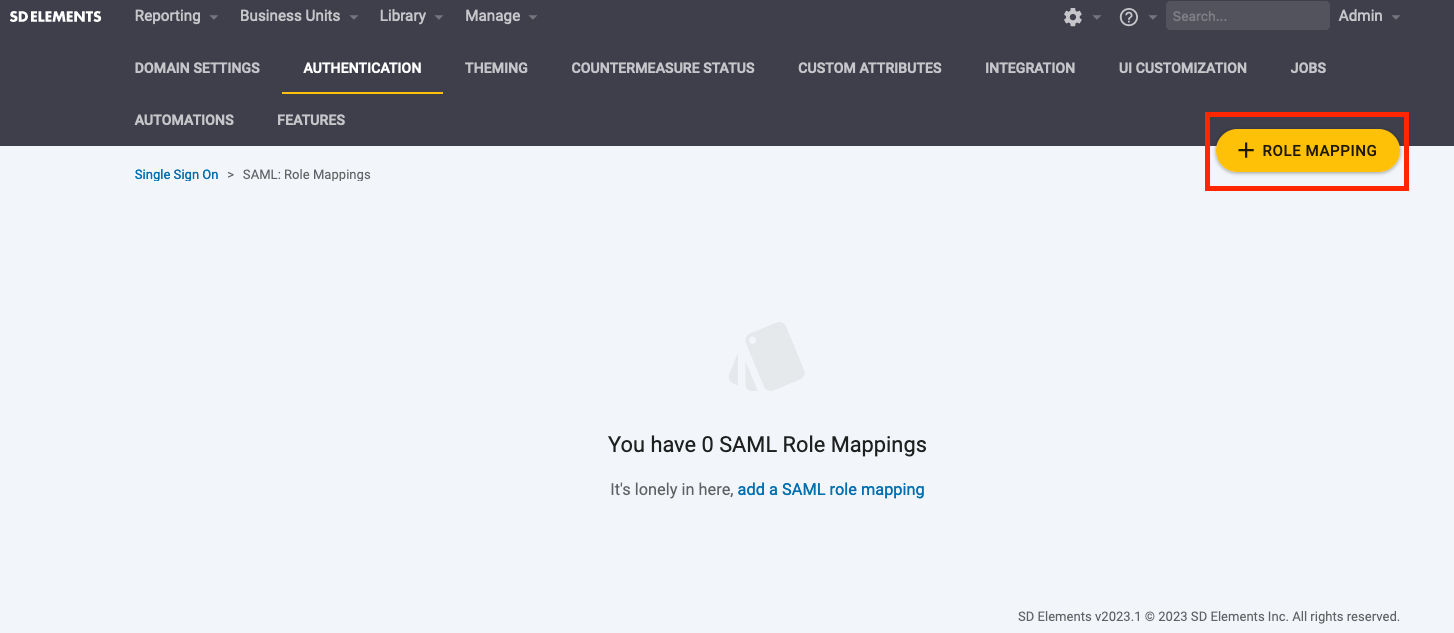
-
In the pop up window, enter the name of the SAML Role that exists in the SAML client that you wish to be mapped.
-
In the pop up window, search for the existing SD Elements role you wish to map to the specified SAML Role.
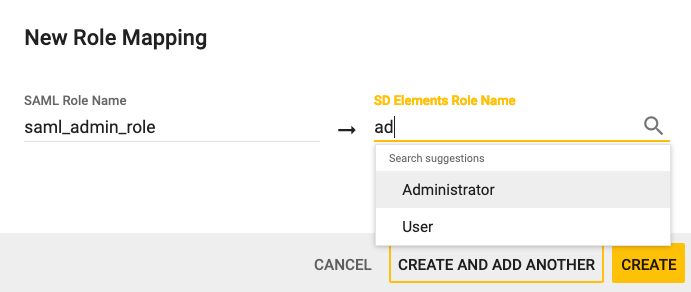
-
If you wish to create multiple mappings you can click the Create and Add Another button, or Click the Create button to save your mapping and exit the form.
Create SAML Group Mappings
Prerequisites
-
The user has the system Super User permission.
-
The SD Elements group you wish to map to must already exist on your instance.
Steps
The following steps will walk you through creating a SAML to SD Elements group mapping.
-
Log in to SD Elements with super user credentials.
-
From the gear icon menu, select Authentication.
-
Click + Group Mappings on the SAML line item you wish to create the mapping for.
-
Click the yellow + Group Mapping button on the top right area of the screen.
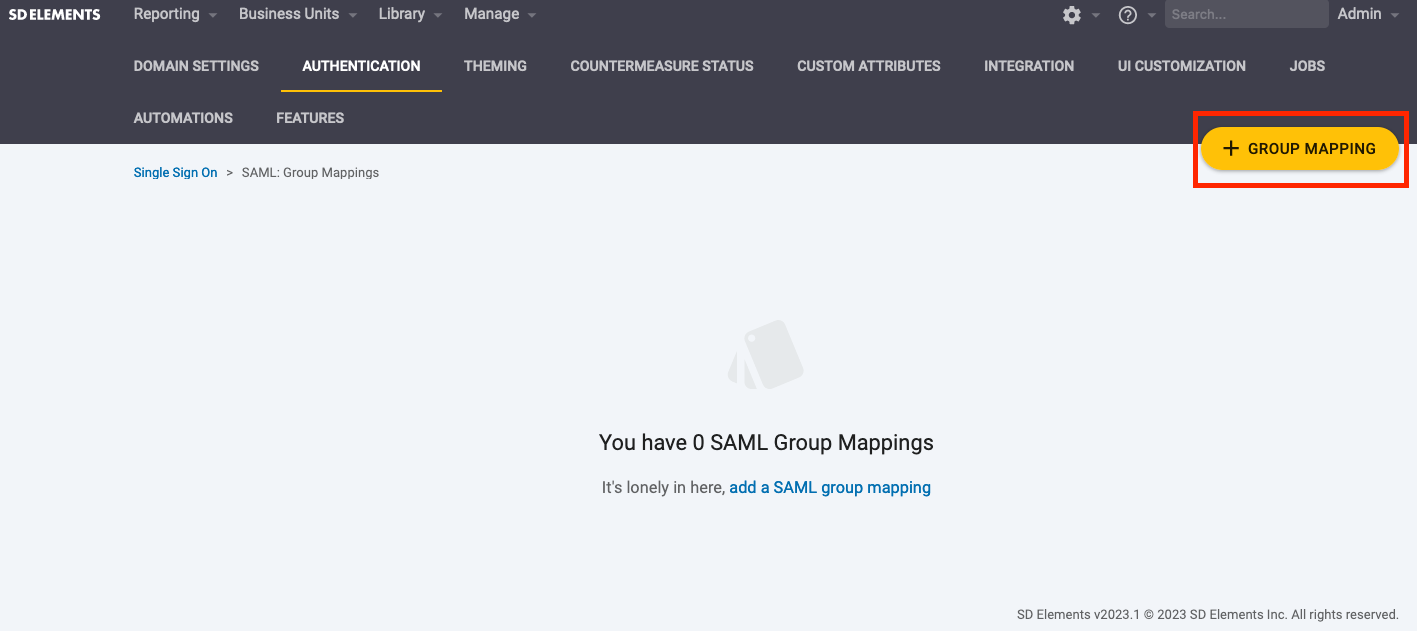
-
In the pop up window, enter the name of the SAML Group that exists in the SAML client that you wish to be mapped.
-
In the pop up window, search for the existing SD Elements Group you wish to map to the specified SAML Group.

-
If you wish to create multiple mappings you can click the Create and Add Another button, or Click the Create button to save your mapping and exit the form.